
Key Takeaways
- Attic fans pull hot air out through the roof vents. They draw cooler air in through soffit vents. This lowers attic temperatures by 30 to 50 degrees.
- A roof-mount attic fan costs $100 to $400 for the unit. Professional installation runs $300 to $700. DIY saves labor but requires basic electrical skills and roof work.
- You need 1 square foot of intake venting for every 300 CFM of fan capacity. Most Monmouth County homes need 1,600 to 2,000 CFM.
- New Jersey homes in Climate Zone 4 need attic insulation of R-49 to R-60. A fan helps, but insulation is what actually blocks heat transfer.
- Hire a licensed electrician if your fan needs a new dedicated circuit. You should also hire one if you are not comfortable working with 120V wiring and roof penetrations.
An attic fan pulls superheated air out of your attic and draws cooler outside air through intake vents. In Monmouth County summers, attic temps can hit 140 degrees. A fan drops that to 90 or 100 degrees. That reduces the load on your AC and extends shingle life.
How Does an Attic Fan Actually Work?
An attic fan is a ventilation device mounted to your roof or gable wall. It pulls hot air out of the attic space and exhausts it outside. Cooler air then enters through soffit vents, gable vents, or ridge vents. Proper ventilation is a core part of our home maintenance services in Monmouth County.
A thermostat turns the fan on when the attic hits a set temperature, usually 90 to 110 degrees. A humidistat adds humidity control. Some models include both. The fan runs only when conditions demand it.
The Department of Energy explains that heat flows from warmer to cooler areas until there is no temperature difference. In summer, your 140-degree attic pushes heat into your 72-degree living space through the ceiling. Insulation slows this transfer. Ventilation removes the heat source. You need both.
Attic fans do not cool your house directly. They cool the attic. That matters because your ceiling is only half an inch of drywall and some insulation. When the attic above it is 140 degrees, heat bleeds through. Drop the attic temperature to 100 degrees, and less heat migrates downward. Your AC works less. Your upstairs bedrooms feel better.
Which Attic Fan Is Right for Your Home?
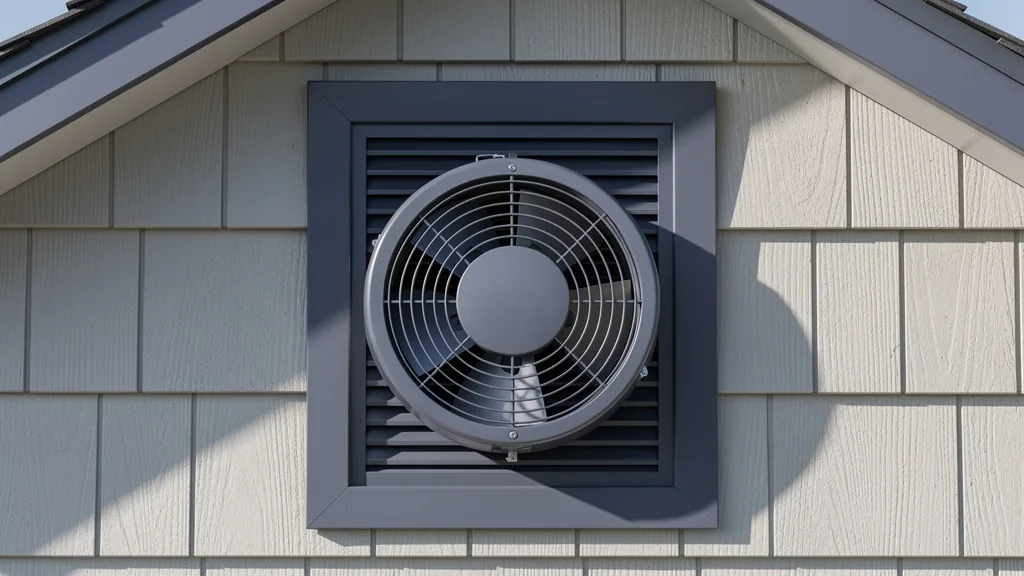
Attic fans come in two types: roof-mount and gable-mount. Roof-mount units sit on the roof deck near the ridge. Gable-mount units install on the gable end wall inside the attic.
Roof-mount fans work best because they exhaust at the highest point. Hot air rises. A roof-mount fan catches it before it pools. Gable-mount fans are easier to install but less efficient. They also require enough gable vent area to function.
Size your fan by attic square footage. Measure the length and width of your attic floor. Multiply to get square footage. Then match that to CFM, or cubic feet per minute. Most manufacturers recommend:
| Attic Size | Recommended CFM | Approximate Fan Size |
|---|---|---|
| 800 sq ft | 1,200–1,600 CFM | 10-inch blade |
| 1,200 sq ft | 1,600–2,000 CFM | 12-inch blade |
| 1,600 sq ft | 2,000–2,500 CFM | 14-inch blade |
| 2,000+ sq ft | 2,500–3,000 CFM | Dual fans or whole-house |
For a typical Monmouth County ranch or Cape Cod, aim for 1,600 to 2,000 CFM. If your attic is 1,500 square feet, a 1,800 CFM fan is about right.
Look for a model with a backdraft damper. This flap closes when the fan is off. It stops outside air from flowing backward into your attic in winter. Some fans include built-in thermostats. Others need a separate control. Buy a combo thermostat/humidistat if your attic gets damp in the shoulder seasons.
What You’ll Need for DIY Installation
Roof-mount installation is harder than gable-mount. It involves cutting a hole in your roof, which is a risk of leaks if done wrong. Gable-mount only needs a hole in the gable wall, which is easier to seal.
For a roof-mount fan, gather these tools:
- Cordless drill/driver
- Reciprocating saw or jigsaw
- Caulk gun with roofing cement
- Tape measure and chalk line
- Screwdrivers
- Wire strippers and a voltage tester
- Ladder rated for roof access
- Safety harness and roof anchors
- Shingles for patching around the fan base
Electrical work should comply with National Electrical Code standards. Our electrical services in Long Branch team handles attic fan circuits safely. For electrical work, you need:
- 14/2 or 12/2 NM cable (Romex)
- Wire nuts and electrical tape
- A dedicated 15-amp circuit, or an existing attic light circuit
- A thermostat/humidistat control
Check your local permit office. Monmouth County towns typically require an electrical permit for new attic fan circuits. Some require a building permit for roof penetrations. Call before you cut. The International Code Council sets minimum standards for roof penetrations and attic ventilation. Attic fans are a smart addition to any complete spring home maintenance checklist.
Step-by-Step: Installing a Roof-Mount Attic Fan
This is the most common installation in Monmouth County. Follow each step carefully. A leaky roof costs more than a professional install.
Step 1: Mark the hole location.
Find a spot near the ridge, at least 18 inches below the peak. Avoid rafters and joists. Use a stud finder or tap the roof deck to locate solid framing. Mark a circle matching your fan housing diameter. Most 1,800 CFM fans need a 16-inch to 18-inch diameter hole.
Step 2: Cut the hole.
Drill a pilot hole from inside the attic. Go outside and verify the location looks right. Cut the hole with a reciprocating saw. Remove the circle of decking. If you hit a nail, cut it flush.
Step 3: Install the fan housing.
Slide the fan housing into the hole. The flange should sit flat on the shingles. Apply roofing cement under the flange. Nail through the flange into the roof deck with roofing nails. Cover the nail heads with more roofing cement.
Step 4: Seal and flash.
Install step flashing up both sides of the fan base. Lay shingles over the flashing and around the base. The goal is to shed water around the fan, not toward it. Use plenty of roofing cement at overlaps.
Step 5: Wire the fan.
Turn off the power at the breaker. Run the NM cable from the fan to your power source. If you are tapping an attic light circuit, verify that the circuit can handle the fan load. A typical attic fan draws 2 to 4 amps. A 15-amp circuit can handle it if the total load stays under 12 amps.
Connect black to black, white to white, and ground to ground. Wire nuts and electrical tape on every joint. Mount the thermostat nearby, away from the fan airflow. Set it to 90 to 100 degrees. If this feels outside your comfort zone, our crew handles home repair in Long Branch and surrounding towns.
Step 6: Test and inspect.
Turn power back on. Wait for the attic to warm up, or temporarily lower the thermostat setting. The fan should spin freely. Listen for vibration or rubbing. Check outside that the backdraft damper opens and closes.
Gable-Mount Installation: The Easier Route
Gable-mount fans are installed on the gable end wall inside the attic. No roof penetrations. No leak risk.
Cut a hole in the gable wall matching the fan housing. Frame the opening with 2x4s if needed. Mount the fan to the framing with lag screws. Vent the exhaust through a louvered gable vent on the outside wall.
The downside? Gable-mount fans move less air than roof-mount units. They also fight against natural ridge vent airflow. If your attic already has ridge vents, a roof-mount fan works better.
Do You Have Enough Intake Ventilation?
An attic fan is only as good as your intake vents. The fan pulls air out. Something has to let air in. Without enough intake, the fan creates negative pressure. That negative pressure can pull conditioned air out of your house through ceiling cracks and light fixtures. Your AC bill goes up, not down.
You need 1 square foot of net free vent area for every 300 CFM of fan capacity. Net free area is the open space in a vent, not the total vent size. A typical 8×16-inch soffit vent has about 28 square inches of net free area. That’s 0.19 square feet. For a 1,800 CFM fan, you need 6 square feet of intake venting. That means about 32 soffit vents.
Walk around your house. Count the soffit vents. If you do not have enough, add more before installing the fan. The Department of Energy warns that air sealing and moisture control are just as important as the insulation itself.
DIY vs. Pro: What It Costs in Monmouth County
| Cost Item | DIY | Professional |
|---|---|---|
| Attic fan unit | $100–$400 | $100–$400 |
| Electrical supplies | $50–$100 | Included |
| Roofing supplies | $30–$60 | Included |
| Labor | Your weekend | $300–$700 |
| Permit | $50–$150 | $50–$150 |
| Total | $230–$710 | $500–$1,250 |
DIY saves $300 to $700 in labor costs. But you take on the risk of a roof leak, electrical shock, or code violation. A pro brings licensing, insurance, and experience with Monmouth County building departments.
If your attic has no existing power source, hire an electrician. Running a new circuit from your panel to the attic involves drilling, fishing cable, and load calculations. That work requires a permit and inspection in most NJ towns.
If your roof is steep, high, or fragile, hire a pro. Falls from roofs account for a significant share of construction-related fatalities tracked by OSHA each year. A safety harness helps, but experience matters more.
Any Time Any Job Handyman installs attic fans across Monmouth County. We pull permits, handle electrical, and warranty our roof work. Not sure about the DIY route? Read our guide on how to choose a licensed handyman in Monmouth County. Then call for a free estimate. Call or text (732) 924-8444 — we’re available 24/7.
Frequently Asked Questions
1. Will an attic fan lower my electric bill?
It can drop your cooling costs by 10 to 30 percent if your attic is poorly ventilated. But insulation matters more. The Department of Energy recommends R-49 to R-60 in Climate Zone 4 attics. A fan helps with ventilation. Insulation blocks heat transfer. You need both.
2. Can I install an attic fan without an electrician?
Only if you are tapping an existing circuit and are comfortable with 120V wiring. Most Monmouth County towns require an electrical permit for new attic fan circuits. If you need a new dedicated circuit, hire a licensed electrician.
3. What’s better: a roof-mount or gable-mount fan?
Roof-mount fans are more efficient because they exhaust at the highest point. Gable-mount fans are easier to install but move less air. If your attic has ridge vents, roof-mount is the better choice.
4. How do I know if I have enough intake vents?
You need 1 square foot of net free vent area for every 300 CFM of fan capacity. Count your soffit vents. Multiply the number of vents by their net free area. If you come up short, add more vents before installing the fan.